So..... slight change of plans.
The "Register Now" button for the Calgary Expo Costume Contest has been howling like a Greek siren all weekend so I caved last night and filled out Marius' information.
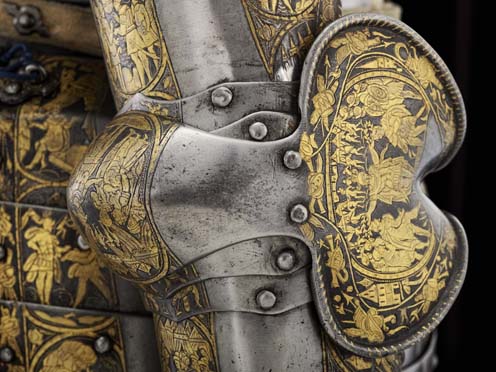
There's nerves and indigestion at work already but they're taking back-bench to the stuff that needs to be done. The costume, as it stands right now, looks like this:

Thanks to Dave Luckman for the shot.
Prior to SDCC last year, I had greaves in the works but they were never finished due to time constraints. So they're first on the list. I spent the bulk of this morning fooling around with tag-board patterns for the sabatons (foot armour). As the photos prove, there wasn't much success:


Foot armour is an fine, fine art I've yet to master and in a fit of pique, I dropped a chunk of leather in to soak, nailed it over the toe of the boot, and poked and prodded it until it looked the way I wanted:

Leather is far more forgiving than tag-board so it did what I wanted with minimal fuss. I'm eventually going to cut it down and sew it to a flat base that will slide over the toe of the boot. Not even going to attempt articulated plates here; instead, there will be a length of pliable leather between the greave bottom and the toe-cap. The Marius Leitdorf miniature shows toe-caps in a vaguely similar style so I think this will be okay.

(WTF... are those gaiters or greaves? You crazy, bro)
Setting the toe-cap aside to dry, the poleyns (knee-caps) were next. The pattern for them was very basic.

The longer piece sits on the outside of the leg (for more protection) and the shorter is on the inside. They attach along the curved fronts and give you this shape:
As per the rest of Marius' armour, the poleyns will have the decorative lettered bands around their edges. Here is everything cut out:

Leather work, while intensely rewarding, is also very time-consuming. To have a polished-looking product, you can't just cut the stuff out and get sewing; instead, there are a number of steps:
1. Cut pieces out.
2. Wet all the edges and buff them with that little white buffer wheel until all of the leather 'fuzz' is smoothed down.
3. Wipe all of the edges down with edge dressing which glues the 'fuzz' down permanently.
4. Run the stitch groover around all of the edges to prepare for your stitches (not done here yet since it's best to wait until everything is completely dry).
To do this collection of pieces, it's approximately an hour and a quarter. The work can be tedious but, frankly, it's nice to be on familiar ground again, especially in light of the Vinkus Guard project (which feels more like guess-work than actual planning...)
Time permitting, I want to make Marius a cape like this:

This is from Lynn McMaster's incredible 1590s Elizabethan Noble's Costume. I mean, just FEAST YOUR EYES. Isn't it fab? So despite being about seventy years out of period for Marius, I'm going to make it anyway because the Warhammer world let's me get away with it and it's sexy as hell.
Next steps:
-Stylus the lettering into the borders
-Glue them on to the armour pieces
-Awl and stitch them on to the armour pieces
-Stitch the poleyns together at the knee caps
-Keep thinking up good puns for the skit
-Have a better week than last week because, seriously.
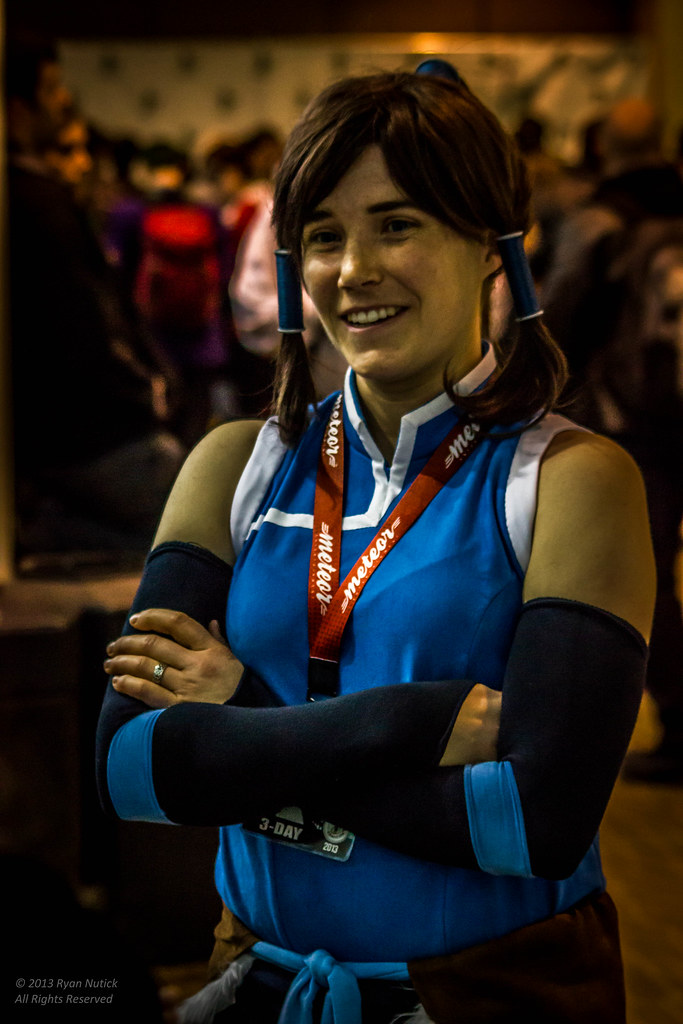
Going to leave you with a super-nice shot of my Korra cosplay from Emerald City Comic Con. Many thanks to tanuki_green for taking such great candid shots and also to the wickedly talented Aziza of Peabody Tailoring for pointing it out!
And finally, a plug for The Tea-Drunk Tailor's Facebook page! Now with more WIPS, costume photos, and bizzarity!
Your stuff is just so inspiring! Kudos!
ReplyDelete